To install landscape timbers, clear the area and lay the timbers in your desired pattern. Secure them with rebar or spikes.
Landscape timbers are a versatile and attractive option for garden edging, retaining walls, and raised beds. They offer a natural look that blends seamlessly with outdoor spaces. Installing landscape timbers can enhance the aesthetics and functionality of your yard. Preparation is key to ensure the timbers are level and secure.
This project can be a rewarding DIY task, providing long-lasting results with minimal maintenance. Proper installation will help prevent shifting and ensure the timbers remain sturdy. Follow these steps for a successful installation and enjoy the enhanced beauty of your garden or landscape area.

Credit: www.youtube.com
Introduction To Landscape Timbers
Landscape timbers are useful for many garden projects. They create borders, define spaces, and add a rustic charm. Installing landscape timbers is simple and fun.
Benefits And Uses
Landscape timbers offer many benefits. They are durable and versatile. Here are some common uses:
- Garden borders
- Retaining walls
- Walkways
- Raised garden beds
Using landscape timbers can make your garden look neat and tidy. They are also great for keeping soil and plants in place.
Types Of Landscape Timbers
There are different types of landscape timbers. Here are the most common ones:
| Type | Description |
|---|---|
| Pressure-Treated Wood | Resistant to rot and insects. |
| Composite Timbers | Made from recycled materials, eco-friendly. |
| Natural Wood | Gives a rustic look, but may need treatment. |
Each type has its own benefits. Choose the one that fits your needs best.
Planning Your Project
Planning your project is the first and most important step in installing landscape timbers. Proper planning ensures that you have everything you need and helps avoid any mistakes. This section will guide you through the essential steps to get your project started on the right foot.
Measuring The Area
The first step in planning is to measure the area where you will install the landscape timbers. Use a tape measure to get the length and width of the space. Write down these measurements to ensure you have accurate information.
- Measure the length: Start from one end and measure to the other.
- Measure the width: Measure from one side to the opposite side.
- Record the measurements: Write down all dimensions for reference.
Gathering Materials And Tools
Once you have your measurements, gather all the necessary materials and tools. This will make the installation process smoother and faster.
| Materials | Tools |
|---|---|
|
|
Having all your materials and tools ready will save you time. It also ensures a smoother installation process.
Preparing The Ground
Before installing landscape timbers, it’s crucial to prepare the ground. This ensures a sturdy and long-lasting installation. Proper ground preparation involves two main steps: clearing the area and leveling the ground.
Clearing The Area
Start by clearing the area where you’ll place the landscape timbers. Remove all debris, including rocks, sticks, and old plants.
- Use a rake to gather loose debris.
- Pull out any weeds and grass by hand.
- Dispose of all waste properly.
A clean and clear area makes the next steps easier and more effective.
Leveling The Ground
Next, you need to level the ground. This step is vital for stability.
- Use a shovel to dig out high spots.
- Fill in low spots with extra soil.
- Use a level to check your progress.
Make sure the ground is even. An uneven surface can lead to unstable timbers.
Here’s a quick table to summarize the tools you need:
| Tool | Purpose |
|---|---|
| Rake | Gather debris |
| Shovel | Dig and level soil |
| Level | Check evenness |
Clearing and leveling the ground sets a strong foundation for your landscape timbers.
:max_bytes(150000):strip_icc()/easily-install-a-landscape-timber-edging-2132416_Hero01-aa038b0b265a40ac9e4886137593263b.jpg)
Credit: www.thespruce.com
Laying The First Timber
Laying the first timber is a crucial step in any landscape timber project. This initial timber will set the foundation for the rest of your structure. Follow these steps to ensure it is done correctly.
Positioning The Timber
Start by selecting a straight, level piece of timber. Place it at the desired location for your project. Use a tape measure to ensure it is positioned accurately. This will help maintain a straight line for the rest of the timbers.
Check the level of the timber using a spirit level. Adjust the ground beneath the timber if necessary to make it level. A level timber ensures stability and aesthetics in your project.
Securing With Stakes
Once the timber is in position, secure it with stakes. Drive wooden or metal stakes into the ground at each end of the timber. This will hold it in place while you continue working.
Use a hammer or mallet to drive the stakes deep into the ground. Ensure the stakes are flush with the timber for a neat appearance. This step prevents the timber from shifting during the installation of additional layers.
For added stability, place stakes at intervals along the length of the timber. This is especially important for longer timbers. Secure each stake firmly to maintain the timber’s position.
Building The Structure
Once you have prepared the site for your landscape timbers, the next step is building the structure. This involves stacking the timbers and securing each layer. Follow the steps below to ensure a sturdy and attractive structure.
Stacking Additional Timbers
Start by laying the first timber layer on the ground. Ensure each timber is level. Use a spirit level to check this. Adjust as needed.
Next, place the second layer of timbers on top of the first. Stagger the joints for added strength. This means the joints of the second layer should not align with the first.
Continue this process for all subsequent layers. Always stagger the joints. This will make the structure stronger.
Securing Each Layer
Once you have stacked a few layers, it’s time to secure them. Use long galvanized nails or rebar stakes. These will keep the timbers in place.
Drive a nail or stake through each timber at the corners. Also, secure the middle for extra strength.
Repeat this process for each layer of timbers. Ensure each layer is firmly attached to the one below it.
For added security, use landscape screws. These provide extra holding power.
Finally, check that the structure is stable and level. Make adjustments as needed to achieve a perfect finish.
Cutting Timbers To Fit
Cutting landscape timbers to fit your project is crucial. This step ensures a snug and professional look. Accurate cuts prevent gaps and misalignment. Follow these steps for best results.
Measuring And Marking
Proper measurement is the first step. Use a tape measure to get the exact length you need. Make sure to double-check your measurements. Write down the numbers to avoid mistakes.
Next, use a carpenter’s pencil to mark the timber. Make clear and visible marks. This will guide your saw. Draw a straight line across the timber using a square. This ensures your cut is straight.
Here’s a simple table for common timber cuts:
| Timber Length | Project Type |
|---|---|
| 4 feet | Garden Borders |
| 6 feet | Pathways |
| 8 feet | Retaining Walls |
Sawing Techniques
Choose the right saw for your timber. A circular saw works well for most cuts. For thicker timbers, use a chainsaw. Always wear safety goggles and gloves.
Start the saw and let it reach full speed. Align the saw blade with your marked line. Slowly guide the saw through the timber. Keep a steady hand for a smooth cut.
Follow these tips for best results:
- Use clamps to secure the timber.
- Cut slowly to avoid splintering.
- Check the cut for accuracy before moving on.
By following these steps, you will have perfectly cut timbers. This makes your landscape project look professional and clean.
Finishing Touches
Once you’ve installed your landscape timbers, it’s time for the finishing touches. This final step ensures your project looks polished and lasts longer. Pay attention to filling gaps, cracks, and applying a sealant for the best results.
Filling Gaps And Cracks
Inspect the timbers for any gaps or cracks. These can happen during installation. Use a wood filler or caulk to fill them. This step prevents water damage and pests.
- Check all joints and corners.
- Apply the filler with a putty knife.
- Smooth the surface for an even look.
- Let it dry completely before moving on.
Applying A Sealant
Sealing the timbers extends their life. It protects them from moisture, UV rays, and pests. Choose a high-quality sealant for the best protection.
- Clean the timbers with a brush.
- Make sure the surface is dry.
- Apply the sealant with a paintbrush.
- Cover all sides and edges.
- Let it dry for 24 hours.
For a quick reference, here’s a simple table:
| Step | Tool | Time |
|---|---|---|
| Filling Gaps | Putty Knife | 15 minutes |
| Applying Sealant | Paintbrush | 1 hour |
| Drying | – | 24 hours |
These finishing touches make your landscape timbers look great and last longer. Follow these steps for a professional finish.
:max_bytes(150000):strip_icc()/easily-install-a-landscape-timber-edging-2132416_09-0045e292ae89499bbbac3cae6e777621.jpg)
Credit: www.thespruce.com
Maintenance Tips
Maintaining landscape timbers ensures their longevity and keeps your garden looking beautiful. Regular care and timely repairs can prevent costly replacements. Follow these maintenance tips to keep your landscape timbers in top shape.
Regular Inspections
Regular inspections are crucial for spotting issues early. Check for signs of rot, insect damage, and warping. Look at the joints and edges where damage often starts. If you see any problems, address them immediately.
- Inspect timbers every three months.
- Check for water pooling around timbers.
- Look for signs of insect infestation.
Repairing Damaged Timbers
Repairing damaged timbers promptly prevents further decay. Small cracks can be filled with wood filler. Larger damage might need a timber replacement.
- Remove the damaged timber.
- Cut a new timber to the same size.
- Treat the new timber with a wood preservative.
- Install the new timber securely.
| Damage Type | Repair Method |
|---|---|
| Small Cracks | Use wood filler |
| Large Cracks | Replace the timber |
| Rot | Replace the timber |
Keep your landscape timbers looking great with regular care. Simple inspections and repairs can extend their life significantly.
Frequently Asked Questions
How Do You Secure Landscape Timbers To The Ground?
Secure landscape timbers using rebar or timber spikes. Drill holes and hammer them through the timbers into the ground.
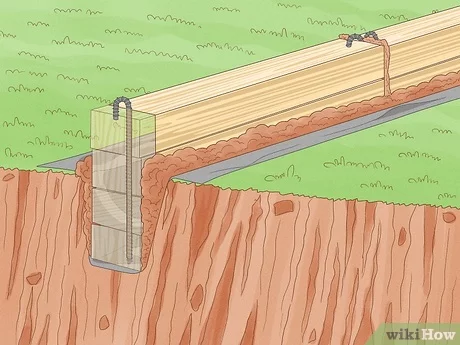
How Deep To Bury Landscape Timbers?
Bury landscape timbers about 4-6 inches deep. Ensure stability by securing them with rebar or stakes.
What Is The Best Fastener For Landscape Timbers?
The best fasteners for landscape timbers are galvanized or stainless steel spikes. These resist rust and provide strong, long-lasting support.
How To Keep Landscape Timbers From Rotting?
To prevent landscape timbers from rotting, apply a wood preservative. Ensure proper drainage. Elevate timbers off the ground. Seal all cuts and ends. Use treated wood for longer lifespan.
Conclusion
Installing landscape timbers can transform your outdoor space. Follow our steps for a durable and attractive garden border. Proper preparation and placement ensure lasting results. Enjoy a beautifully defined landscape that enhances your home’s curb appeal. With the right tools and techniques, your DIY project will be a success.