To install landscape edging, outline the desired area and dig a trench. Place the edging material and secure it firmly.
Landscape edging adds definition and structure to your garden or lawn. It separates different areas, preventing grass from encroaching into flower beds. Various materials like plastic, metal, and stone offer flexibility in design and durability. Proper installation ensures longevity and reduces maintenance efforts.
Selecting the right type and style enhances the overall aesthetic appeal of your outdoor space. This guide provides simple steps for a successful installation, transforming your garden into a well-organized and attractive landscape. Whether you aim to create clean lines or intricate designs, landscape edging is a valuable addition to any yard.

Credit: www.olyola.com
Choosing The Right Edging Material
Selecting the best material for landscape edging is crucial. It affects the look and durability of your garden. Each material has its own pros and cons. Let’s explore the options and factors to consider.
Types Of Materials
There are many types of materials for landscape edging. Here are some common choices:
- Plastic: Affordable and easy to install.
- Metal: Durable and sleek but can be expensive.
- Wood: Natural look but may rot over time.
- Stone: Long-lasting and elegant but heavy.
- Brick: Classic look but can be costly.
Factors To Consider
Consider these factors when choosing your edging material:
- Budget: How much are you willing to spend?
- Durability: How long do you want it to last?
- Maintenance: How much upkeep are you ready for?
- Style: Does it match your garden’s look?
- Ease of Installation: Can you install it yourself?
| Material | Pros | Cons |
|---|---|---|
| Plastic | Cheap, Easy to install | Not very durable |
| Metal | Durable, Sleek | Expensive |
| Wood | Natural look | Can rot |
| Stone | Long-lasting, Elegant | Heavy |
| Brick | Classic look | Costly |
Tools And Supplies Needed
Installing landscape edging is a great way to define your garden. It keeps your garden neat and tidy. Here, we’ll cover the tools and supplies needed for the job.
Essential Tools
- Shovel: For digging the trench where the edging will sit.
- Hammer: To secure the edging stakes into the ground.
- Measuring Tape: Ensures the trench is the right depth and length.
- Level: Keeps the edging straight and even.
- Garden Gloves: Protects your hands while working.
- Utility Knife: Cuts the edging material to the right length.
Optional Supplies
- String Line: Helps to lay out a straight line for the edging.
- Edging Stakes: Provides extra support for the edging material.
- Sand or Gravel: Creates a stable base for the edging.
- Mulch: Adds a finished look to the garden bed.
- Edging Spikes: Additional security for the edging.
Preparing The Area
Before installing landscape edging, you need to prepare the area. Proper preparation ensures a smooth installation process. It also guarantees the edging will last long.
Clearing The Space
First, remove any debris from the area. This includes rocks, leaves, and old plants. Use a rake to clear smaller debris. For larger items, you might need a shovel.
Next, trim any grass or weeds in the area. You can use garden shears for this. Make sure the ground is level. A level ground helps the edging sit evenly.
Marking The Layout
Mark the layout of your landscape edging. Use a garden hose or string. Lay it out where you want the edging to go.
Once you are happy with the layout, mark it with spray paint. This will be your guide during installation.
You can also use stakes and string to mark straight lines. For curved edges, the hose method works best.
Double-check your layout. Make sure it fits your garden design.
Credit: www.homedepot.com
Installing Plastic Edging
Plastic edging is a great way to define garden beds. It is durable, flexible, and easy to install. Follow these steps for a professional-looking installation.
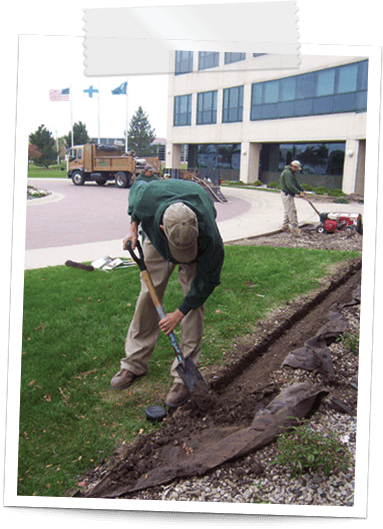
Digging The Trench
First, outline the area where you want the edging. Use a garden hose or string to mark the path. This helps ensure a straight edge.
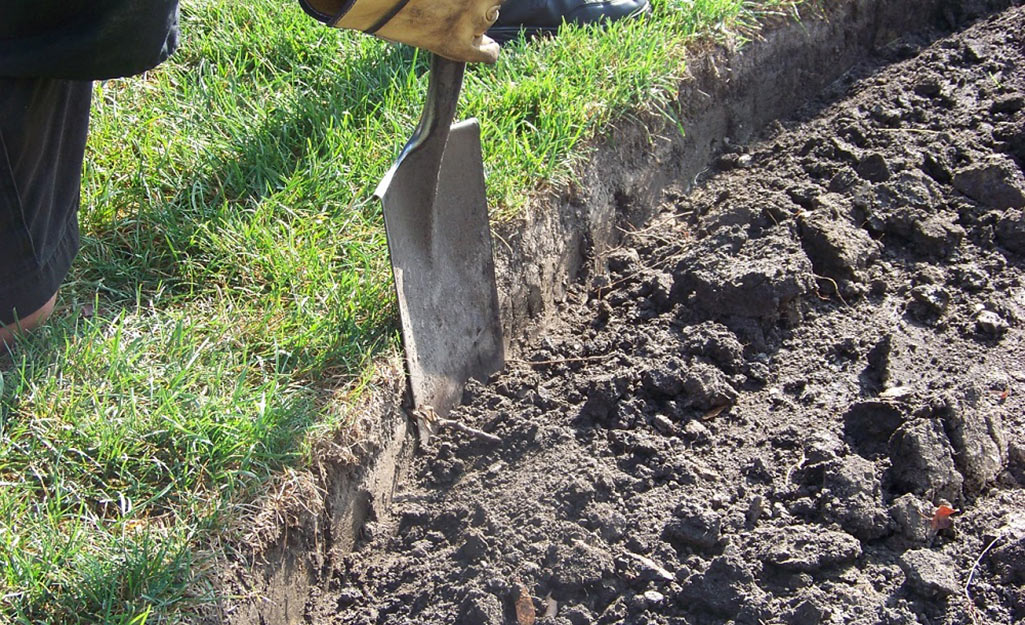
Next, grab a spade or trenching tool. Dig a trench along the marked path. The trench should be about 4 inches deep and 6 inches wide. This depth will secure the plastic edging firmly in place.
Remove any rocks or roots from the trench. This ensures a smooth installation. Keep the soil you dig out nearby; you’ll need it later.
Securing The Edging
Unroll the plastic edging and place it in the trench. Make sure the top of the edging is level with the ground. If needed, trim the edging to fit.
Use garden stakes to secure the edging in place. Insert a stake every few feet. This prevents the edging from moving. Hammer the stakes into the ground until they are flush with the edging.
Once the edging is secure, fill the trench with the soil you set aside. Pack the soil tightly around the edging. This provides extra stability and prevents shifting.
Finally, water the area to help the soil settle. Your plastic edging is now installed and ready to define your garden beds.
Installing Metal Edging
Metal edging is a durable option for your landscaping project. It creates a clean separation between different areas of your garden. Follow these steps to install metal edging effortlessly.
Cutting To Size
First, measure the area where you will install the metal edging. Use a tape measure for accuracy. Mark the required length on the metal piece. Use a hacksaw to cut the metal to the desired size. Wear gloves to protect your hands. Cut slowly to avoid any jagged edges. Double-check the measurements before cutting.
Anchoring The Edging
Place the metal edging along the marked line. Ensure it follows the shape of your garden bed. Use metal stakes to secure the edging. Drive the stakes through the pre-drilled holes in the metal. Space the stakes about 18 inches apart. Use a rubber mallet to hammer the stakes into the ground. Make sure the stakes are flush with the edging.
| Step | Action | Tools Needed |
|---|---|---|
| 1 | Measure the area | Tape measure |
| 2 | Mark the metal | Marker |
| 3 | Cut the metal | Hacksaw, gloves |
| 4 | Place the edging | None |
| 5 | Secure with stakes | Metal stakes, rubber mallet |
After anchoring, check the edging for stability. Adjust the stakes if needed. Fill any gaps with soil. Enjoy your neat and clean garden border!

Credit: www.youtube.com
Installing Stone Edging
Stone edging adds a natural and durable boundary to any garden. It enhances the landscape while keeping soil and mulch in place. Follow these steps to install stone edging in your garden.
Laying The Foundation
Start by marking the area for your stone edging. Use a garden hose or string to outline the shape. Make sure the lines are straight or curved, based on your design.
- Dig a trench along the marked area.
- The trench should be about 6 inches deep and wide.
- Remove any grass, roots, or debris from the trench.
Next, add a layer of gravel to the trench. The gravel provides a stable base for the stones. Spread the gravel evenly and compact it using a tamper.
Placing The Stones
Begin placing the stones in the trench. Start at one end and work your way to the other.
- Position the first stone at the beginning of the trench.
- Ensure the stone is level using a carpenter’s level.
- Continue placing stones, leaving a small gap between each one.
Fill the gaps with sand or gravel to stabilize the stones. Tap each stone gently with a rubber mallet to secure it in place. Adjust as necessary to keep the stones level.
| Tools Needed | Materials Needed |
|---|---|
| Shovel | Stones |
| Tamper | Gravel |
| Carpenter’s Level | Sand |
| Rubber Mallet | String or Hose |
Water the area lightly to help the stones settle. Check for any shifting and make final adjustments. Your stone edging is now ready to enhance your garden’s beauty.
Maintaining Your Edging
Proper maintenance of landscape edging ensures it stays attractive and functional. Regular care prevents damage and keeps your garden looking neat. This section covers two main aspects: Regular Cleaning and Repair Tips.
Regular Cleaning
Regular cleaning of landscape edging is essential. It prevents dirt and debris buildup, which can cause damage. Use a garden hose to rinse the edging weekly. This removes loose soil and plant matter. For tougher stains, use a scrub brush and mild soap solution. Rinse thoroughly to avoid soap residue.
Trim grass and plants near the edging. Overgrown vegetation can damage it. Use garden shears or an edger tool. Keep the area around the edging clean and clear.
Repair Tips
Over time, edging can get damaged. Quick repairs prevent further issues. Below are some common problems and solutions:
- Cracks or Breaks: Fill small cracks with epoxy or a similar filler. For larger breaks, replace the damaged section.
- Loose Edging: Use stakes or anchors to secure loose sections. Ensure they are tightly fixed to the ground.
- Discoloration: Clean the affected area with a stain remover. Repaint or stain if necessary to match the rest.
Inspect the edging regularly. This helps you identify issues early. Replace any severely damaged parts promptly to maintain the overall look.
Enhancing The Landscape
Landscape edging transforms your garden. It makes your yard look neat and tidy. Edging creates defined areas. It helps keep plants and mulch in place. This section will show you how to enhance your landscape.
Adding Plants
Adding plants can bring color and life to your yard. Choose a variety of plants. Mix flowers, shrubs, and small trees. They will add different heights and textures.
- Flowers: Add pops of color.
- Shrubs: Provide structure and greenery.
- Trees: Offer shade and height.
Planting in layers looks best. Place taller plants at the back. Shorter plants go in the front. This creates a tiered effect.
Incorporating Mulch
Mulch helps retain moisture in the soil. It also prevents weeds. There are different types of mulch. You can use bark, wood chips, or stones.
| Type of Mulch | Benefits |
|---|---|
| Bark | Good for moisture retention |
| Wood Chips | Great for natural look |
| Stones | Lasts longer |
Spread mulch around your plants. Keep it a few inches away from plant stems. This will prevent rot.
Frequently Asked Questions
What Is The Best Way To Install Landscape Edging?
The best way to install landscape edging is to mark the area, dig a trench, place the edging, and secure it with stakes.
How Do You Hold Landscape Edging In Place?
Secure landscape edging with stakes or spikes. Place them evenly along the edging. Ensure proper depth for stability. Use a rubber mallet to drive stakes in. Firmly pack soil against the edging.
What Do You Put Under Landscape Edging?
Place landscape fabric, gravel, or sand under landscape edging. This ensures stability and prevents weeds.
How Far Should Landscape Edging Stick Up?
Landscape edging should stick up 1 to 2 inches above the ground. This height is ideal for defining garden borders.
Conclusion
Installing landscape edging transforms your garden effortlessly. It defines spaces, prevents soil erosion, and enhances curb appeal. Follow the steps carefully for professional results. With the right materials and techniques, your garden will look polished and well-maintained. Enjoy the benefits of a beautiful, edged landscape that adds value to your outdoor space.